
by www.theartofmanliness.com
Editor’s note: This is a guest post from Ethan Hagan of One Project Closer.
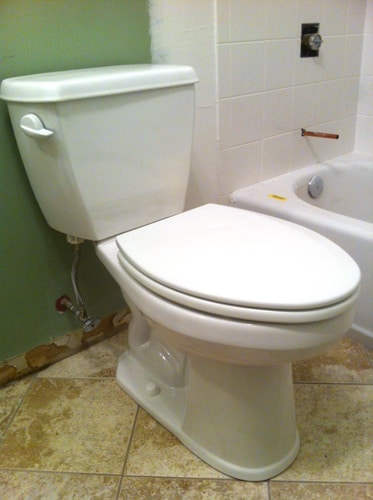
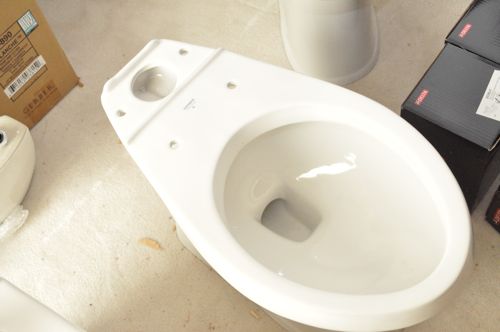
Is your toilet cracked or damaged? Did your kid flush something that’s blocking the line? Are you looking to upgrade your commode? There are plenty of reasons for installing a toilet, and many homeowners call in a plumber to get it done. However, if you’re reasonably handy, consider trying this one yourself and saving a few bucks. Installing a toilet is a great DIY project, and just imagine the sense of accomplishment (and relief) when you finish. This tutorial will walk you through it step-by-step.
Tools & Materials
Installing a toilet doesn’t require much in the way of tools, and in fact, you can accomplish the task without any power tools. Here’s what you’ll need before getting started:
Toilet - plumbers I’ve spoken with say Kohler makes the best and most cost efficient toilets, and they don’t recommend anything less than 1.6 gallons per flush,
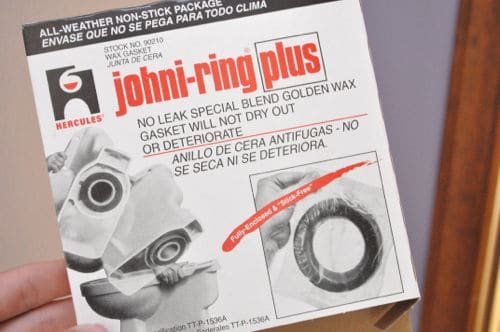
Wax ring - if the flange sits even with or slightly below the floor, get an extended-height wax ring.
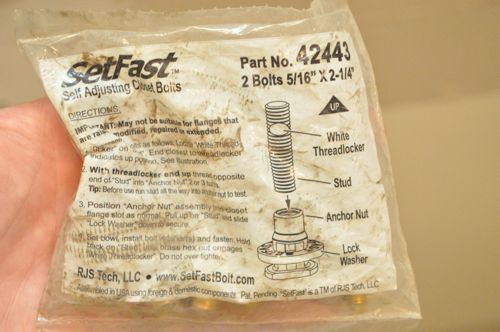
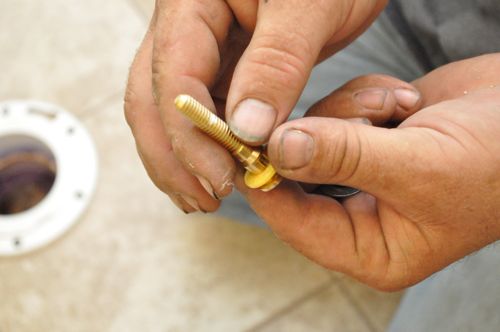
Closet bolts - self-adjusting closet bolts mean you won’t need to cut or snap the excess bolt length.Unfortunately, the local DIY center may not carry these, so check a plumbing supply shop.
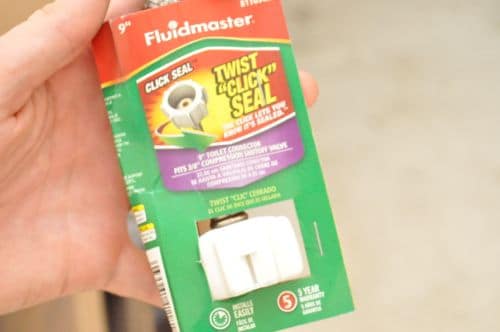
Toilet connector - flexible, braided steel connectors eliminate using a tubing bender to fit the supply line between the stop-valve and the tank fitting.
- Pennies or stainless steel washers - for shimming the toilet.
- Torpedo level
- Adjustable wrench
- Screwdriver
I like to assemble the toilet before installing. The tank adds a little more weight but it’s much more convenient in my opinion. If you prefer, you can attach the tank afterwards.
Most manufacturers include all the necessary hardware and often install the fill-kit too. Double-check everything to make sure it’s right, and be careful not to over-tighten the nuts, which will crack the porcelain.
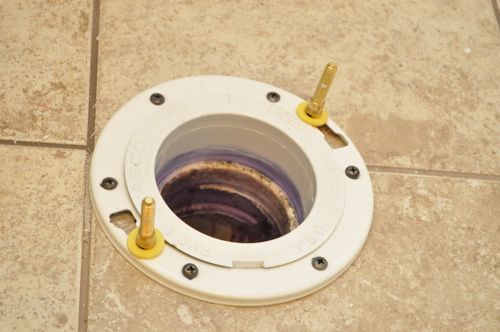
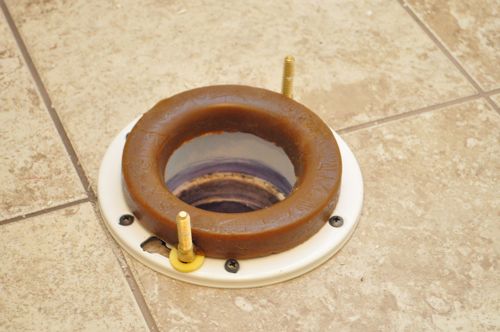
Step 1: Prepare the Flange
After you remove the old toilet, scrape away the nasty, old wax ring with some cardboard or something you can throw away. Inspect the flange, and if it’s cracked or damaged, repair kits are available at your local DIY center. For those up to the task, you can replace your flange without too much difficulty, but that’s outside the scope of this tutorial.

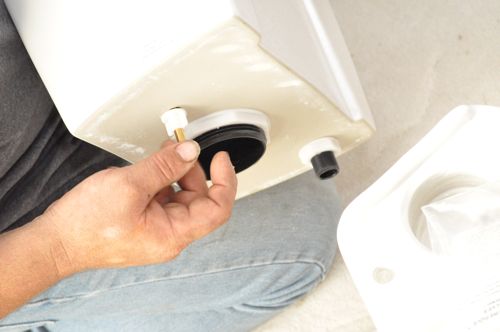
Step 2: Position Closet Bolts
Using self-adjusting closet bolts is the way to go because they eliminate the need to snap or cut excess bolt length. These bolts feature a white threadlocker that, when the hex nut reaches it, drives the stud further into the anchor nut.
Slip the closet bolts on either side and move the lock washers down snug against the flange.
Step 3: Place Wax RingYou can put the wax ring directly on the flange or on the underside of the toilet. I opt for putting it on the flange because there’s no chance it’ll fall off when I’m lugging the toilet around.

If your flange is sitting a little low, use an extended-height wax ring.
Step 4: Set Toilet
Move the toilet over the flange and line up the holes with the closet bolts.
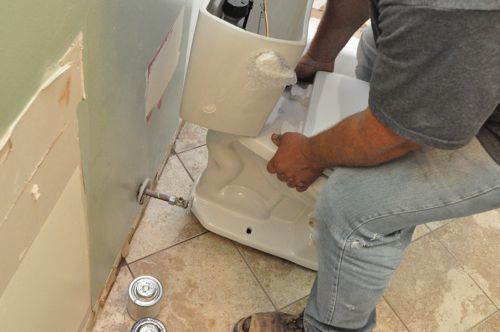
When it’s in position, firmly press the toilet against the floor.
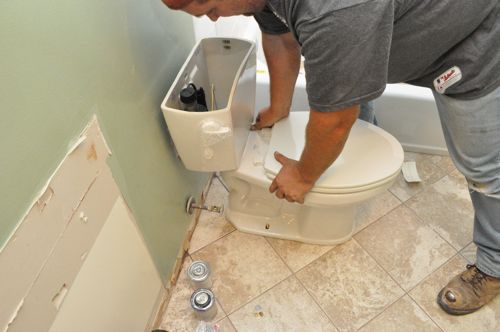
Step 5: Add Washers and Nuts
Put the nylon washers and regular washers over the bolts and hand-tighten the nuts on both sides.
Step 6: Level the Toilet
Check the toilet for level front-to-back and side-to-side.

If it’s out of level or rocks back and forth, shim the toilet with pennies or stainless steel washers. You can buy plastic toilet shims; however, I’d advise against them because they often crack when I attempt to cut them to size.
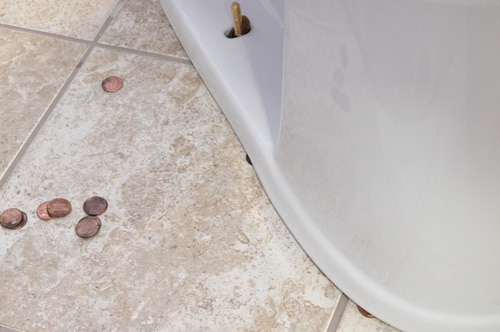
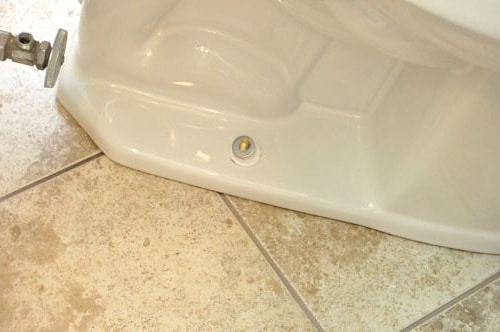
When you’re satisfied that the toilet is level, tuck the pennies underneath the edge and out of sight. Next, tighten the nuts on the closet bolts, but not too tight. Attach the bolt caps to conceal the closet bolts.

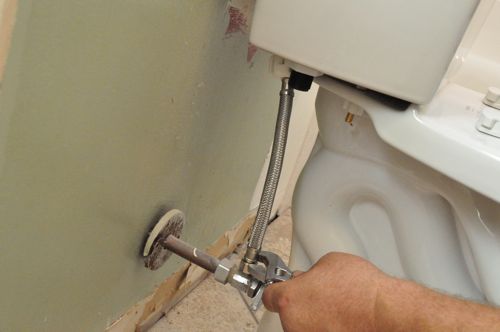
Step 7: Attach Supply Line
Most toilets take a 3/8″ connector, and the connector I show here includes rubber gaskets that eliminate the need for wrapping threads with teflon tape.
Step 8: Verify Fill Level
When everything is connected, open the supply valve and let the tank fill up. Check for leaks and adjust the fill valve so that the water meets the fill line.

If your looking for a plumber in Greater Charlotte, Concord, Harrisburg and… Contact the plumbing experts at Pathmaker Plumbing: 704-773-7507 www.pathmakerplumbing.com